Impresszum Help Sales ÁSZF Panaszkezelés DSA

Best apps for Taking Notes on iPad, Android, PC and Mac

Note-taking is one of the best habits anyone can instill. The mere act of writing whatever you learn in lectures, seminars, and even life in general, can have a profound impact on your life.

A note-taking app is a lightweight tool that allows you to digitally record information on your device instead of writing it on paper.

You can type, draw, add images, checklists and even attach files to your notes. There are lots of modern abilities which you can check out and you will like it.

The best note taking apps make it simple and easy to organize essential information and store it for quick access.

What's more, some note taking apps is cross-platform and works on Mac, Windows, Chrome OS, iPadOS and Android – a huge advantage since people normally use all kinds of devices. Everything is also synced across the devices.

Note-taking apps have all but taken the place of paper notes, and, with all of their extensive functions, can help you build an easily-accessible second brain.

There are now hundreds of note-taking tools available to users, But which one is the best for you? Sometimes too many options can be overwhelming.

Choosing the right note-taking app can be a daunting task, but don't worry – We have narrowed down the top 20 picks for note-taking apps to help you.

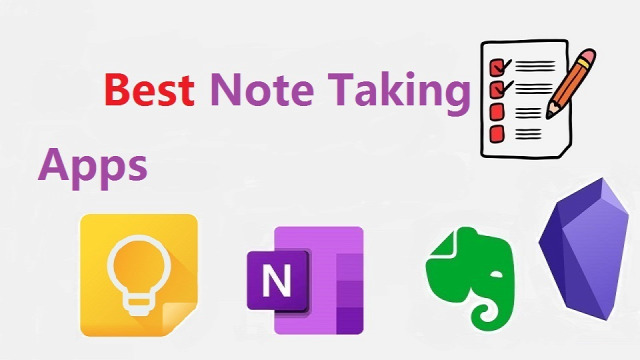
The 20 Best Note-Taking Apps in 2024

Here are 20 popular note taking apps that are widely used right now. Some are all-around great choices for every note-taking task, while others are more suited to individual or collaborative use.

1. OneNote

OneNote is a comprehensive note-taking app developed by Microsoft. It allows users to create notes in various formats, including text, images, and audio, and organize them in notebooks and sections.

2. Notion

Notion is a versatile productivity app that combines note-taking, project management, and database functionalities. It allows users to create notes and organize them in a hierarchical structure, as well as collaborate with others and track tasks.

3. Evernote

Evernote has been a popular choice for note-taking for many years. It has a wide range of features, including the ability to create notebooks, organize notes with tags, and sync across devices.

4. Obsidian

Obsidian is a great app for taking notes and organizing your thoughts. It's simple to use and has a lot of features that other note-taking apps don't have. The only downside to Obsidian is that it's not free, but it's worth the price.

5. Joplin

Joplin is an open-source note-taking and to-do app that allows for the creation of plain-text notes and supports synchronization with various cloud services. It runs on iOS, macOS, Android, Windows, and Linux.

6. Google Keep

Google Keep is a simple and easy-to-use note-taking app that integrates with other Google services, such as Google Docs and Google Drive. It allows users to create notes, lists, and reminders.

7. SimpleNote

Simplenote is a minimalistic note-taking app that allows users to create, edit, and sync notes across devices. It also supports tagging and search functionalities.

8. Standard Notes

Standard Notes is a secure and private note-taking app that offers plain-text editing, encryption, and cross-platform synchronization.

9. Zoho Notebook

Zoho Notebook is a beautiful and intuitive app that lets you create notes, lists, sketches, audio recordings and web clippings.

10. Bear

Bear is a stylish and intuitive note-taking app known for its markdown support, making it ideal for students who need to format their notes efficiently.

11. Notability

Notability is a powerful and versatile note-taking app that allows students to take handwritten notes, annotate PDFs, record lectures, and organize their notes effectively. It also supports syncing with cloud storage services like Google Drive and Dropbox.

12. GoodNotes

GoodNotes is another popular app for handwritten note-taking. It offers a wide range of pen and highlighter options, shape recognition, and advanced search capabilities to find notes quickly.

13. Roam Research

Roam Research is a powerful PKM tool designed for pro note-takers to make notes, capture ideas and most importantly connect them up using backlinks & a graph.

14. Squid

Squid is a powerful, intuitive, and delightful Android note-taking app. You can take handwritten notes just like you would on paper, but with many advantages of digital vector ink! Easily markup PDFs to fill out forms, edit/grade papers, take lecture notes, or sign documents.

15. Logseq

Logseq is a personal knowledge management tool that is not well-known, but it's one of the best note-taking apps out there.

Logseq's "interstitial journaling" approach allows for seamless integration of daily tasks and thoughts, making it a useful tool for productivity and organization.

16. Workflowy

Workflowy is a clean and distraction-free app that helps you quickly capture notes, plan your to-do's, and get organized. Simple to use, but incredibly powerful, Workflowy can help you manage all the information in your life.

17. Dynalist

Being an outliner software, Dynalist is a collaborative note-taking tool that can also help you take notes hierarchically. The software organizes information in a way that helps you with recall, much like a second brain.

18. Ulysses

Ulysses is a powerful tool perfect for Mac users who want to take their note-taking to the next level. It is a feature-rich app with a clean and simple interface, making it easy to use.

However, this tool is not freely available, hindering some people from being able to utilize it.

19. Apple Notes

The pre-installed Apple Notes app is a simple and user-friendly option for basic note-taking. It supports text, handwriting, images, and checklists and syncs across all Apple devices.

20. Dropbox Paper

Dropbox Paper is a document editor and note taking app that can be greatly beneficial in a wide range of scenarios.

Users will find Dropbox Paper's simple and distraction-free layout makes it perfect for everyday writing.

How to choose the best note taking apps?

The app you use for note-taking can have a huge impact on the quality of your notes. You need to consider some important factors before choosing.

We have assessed note taking apps for ease of use, features, organization tools, team collaboration, cloud storage, cross-platform compatibility, handwriting support, and a number of other factors.

Add all types of content

Most note taking apps allow you to add a wide variety of content to your notes. for example, with Audio recording function support, you can record sound bites from your lectures, or even an entire lecture, as a backup to your note-taking.

Using apps like OneNote you can record audio or video into a page, embed online videos and other content, clip from your screen or the web, print documents directly into your notebook and add photographs or scan documents using your devices camera and Microsoft Lens.

Organization Tools

One of the main aspects of note-taking apps is how they organize your notes. There are broadly two organizational systems that note-taking apps use: folders and tags.

Folders are what you'll likely be familiar with from Windows' File Explorer or Finder on Mac.

Tags use a different approach. You first give each note page a unique label (or tag). Then, you can find notes under a specific tag by selecting the tag name in your workspace.

Evernote utilizes a good tagging system. However, it's not the best choice for using folders, as it only offers two layers of depth: Notebooks and Notebook Stacks.

If you want a deeper hierarchy, Notion is a top choice that uses infinitely-nested folders, so you can create a fully fleshed-out structure for your notes.

Team Collaboration

If you're working with a group of colleagues, consider creating a shared online notebook so you can collectively collate notes and resources and add comments without having to physically meet up.

This means you can't lose shared material. Notes can be shared with the click of a button, and as long as they are saved or backed up it's pretty difficult to lose them.

Search Functionality

An obvious reason for you to take notes is so that you can go back and review them later. But sometimes flipping through pages of notes to find one piece of information can be frustrating.

Many note-taking apps offer search functionality where you can search for keywords and phrases to quickly find information. Some note-taking apps even allow you to search your handwriting.

Cloud Storage

If you use OneNote, your notes will be stored in your Office 365 account by default. This will make them available on any device as long as you log into the apps using your University account details.

Most other note taking apps include cloud storage too. Keeping your notes in the cloud means they're available for you to read or add to wherever you are, on any device, and there is less chance of losing them.
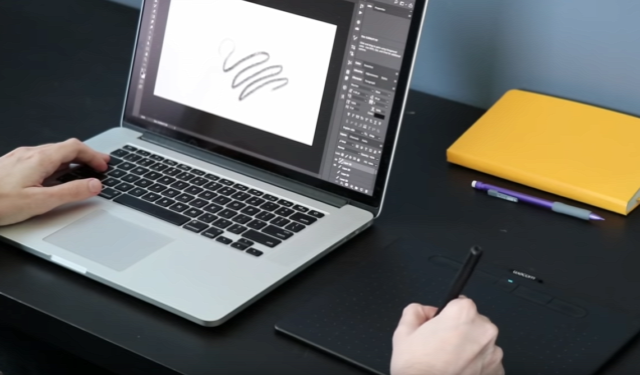
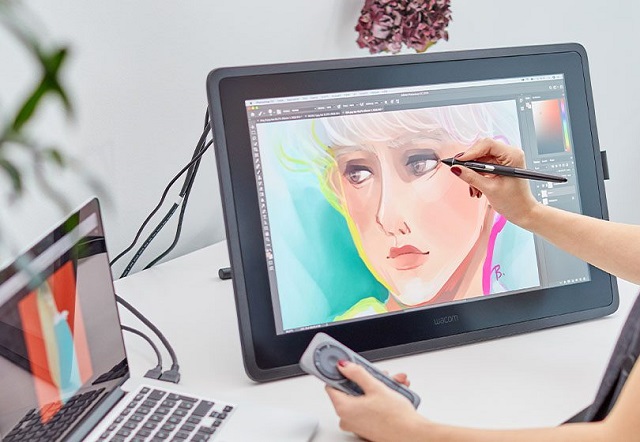
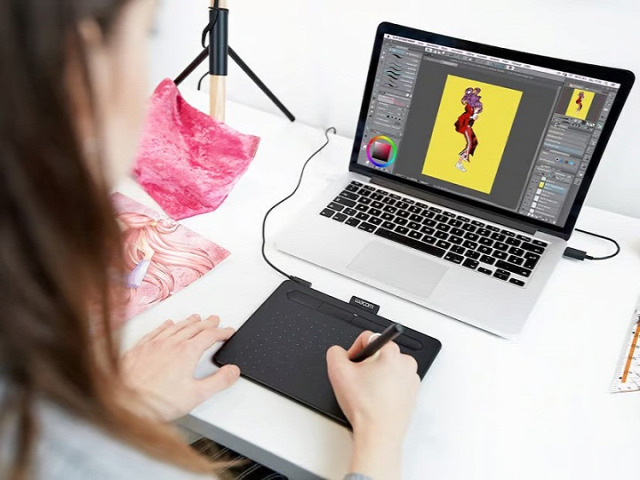
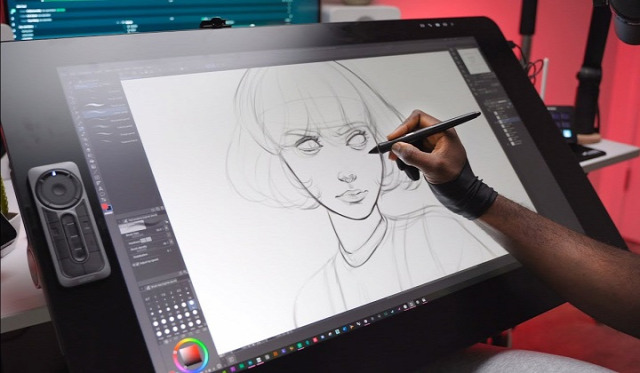
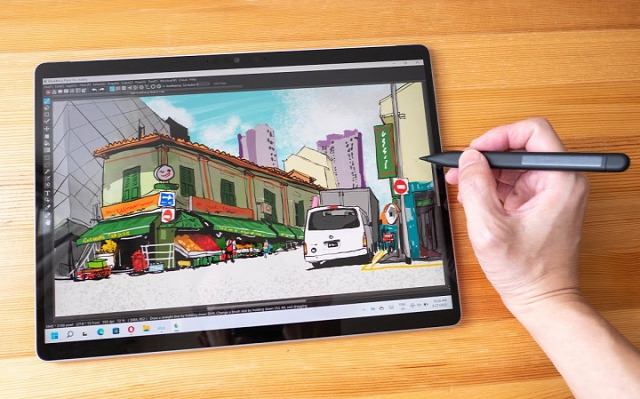
Write by hand

Writing by hand can be quicker for some and may feel more natural than typing.

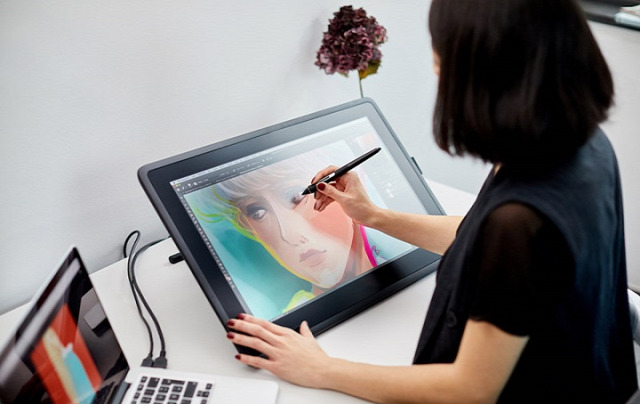
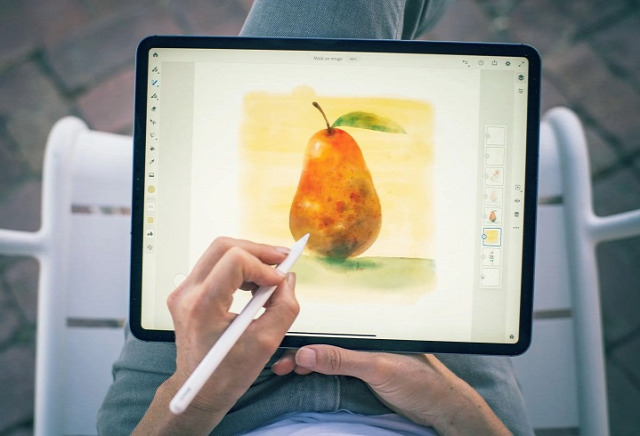
If you have a pen tablet for note taking, you can write directly into app with a stylus, with the option of converting this to text later on.

You can also use a pen to annotate PDF or Word documents when researching or reading documents.

Most note taking apps don't offer the option to write and sketch by hand, which can feel limiting to a lot of people.

Several note-taking apps that support hand-written are OneNote, Evernote, Notability, Goodnotes, Apple Notes, and Squid.

Related Posts: Drawing Pads for Annotating PDF DocumentsBest iPads for DrawingBest Android Pen Tablets.

Price

Our picks include a mix of free and paid options to meet the needs of different users; when possible, we note when free apps also include in-app purchases and what features those extra fees unlock.

When deciding which of the note-taking apps to use, consider what your needs are.

Free and simple apps will deliver a simple experience, but for more complex feature needs you should probably look to an app with a paid for subscription.

Conclusion

Taking notes is a powerful habit to build; one that can dramatically increase your productivity and your creativity.

Note-taking apps keep your information organized and help you focus on what's most important.

We highly recommend these 20 well-known note-taking apps, each with its own strengths and features.

Whether you're looking for a simple, all-in-one solution, or something more powerful and versatile, there's an app for that.

Taking notes has never been more exciting or easier! It is a good idea to try out a few different apps and see which one works best for you.

Source: https://pctechtest.com/20-best-note-taking-apps

Tovább

Best Wireless and Bluetooth Drawing Pen Tablets

Wireless drawing tablets are great if you're trying to make a desk looks cleaner, or like drawing with your tablet on your lap.

Mobile productivity hounds who want gear that's ready for travel swear by them, too, and some models are able to be wireless, carried around by itself, and even let you draw directly on the screen.

Thanks to hyper-fast connections and long-lasting batteries, you no longer have to sacrifice some more practical functions to enjoy the freedom of using a wireless tablet.

In fact, they're so fast and reliable nowadays that even the hard-to-please artist crowd is beginning to embrace them.

These days, the pen tablet market offers plenty of wireless options, from basic non-screen units to standalone display tablets.

If you are a beginner and don't have much expertise, picking the best wireless bluetooth drawing tablets for your needs can be difficult.

In this article, we provide all the buying advice and deep-dive reviews you need to select the right wireless drawing tablet.

We've spent hours and hours researching each model, surfing the web, just to bring you a list of the very best wireless graphic tablets around.

What are the two types of wireless drawing tablets?

Bluetooth pen tablets connect with the device over Bluetooth completely wireless connection no need for a dongle.

But some wireless tablets work on 2.4 GHz radio frequency they need a dongle to insert into the USB port of the connecting device.

2.4GHz vs Bluetooth Connection: Which is Better or faster?

The answer depends on what the connection is used for, and what version of Bluetooth you're talking about.

2.4GHz will usually offer lower latency than Bluetooth but use more power.

Bluetooth technology has been refined over the years, but the older versions of it are still used for some applications. The different versions are numbered with the latest version being Bluetooth 5.

The later versions have significantly increased the transmission range as well as the speed and capacity of earlier versions.

In general, when shopping for Bluetooth drawing tablets, it's best to look for tablets using the latest version of Bluetooth.

What are the advantages of a wireless pen tablet?

Wireless drawing tablets are a great way to boost your productivity and comfort levels at work or home.

One of the main advantages of wireless pen tablets is that they eliminate the need for cables and wires that can clutter your desk and limit your movement.

With wireless connection, you can position your tablet wherever you want, as long as they are within the Bluetooth or USB range of your computer.

This gives you more flexibility to adjust your posture, angle, and distance according to your preferences and needs. You can also easily move your devices around if you need to change your location or work on different surfaces.

With no wires, there's little risk of damage or interference due to any accidental pulls or trips over cables!

And it is much easier to transport, since you don't need to worry about pesky wires and cables. This makes it perfect for people who need a mobile solution, such as students, business people, and more.

In addition, The wireless pen tablet also comes with a usb cable for easy plug-and-play in case your device doesn't have Bluetooth or the tablet itself is out of battery.

What are the disadvantages of using a wireless drawing tablet?

Wireless tablet require batteries, which can run out of juice at the most inconvenient times.

Compared to a wired tablet, Wireless tablet can sometimes have a slight delay in their response time, which maybe a disadvantage in situations where precise movements are required.

Wireless tablet can be susceptible to interference from other wireless devices, which can cause the tablet to malfunction or become unresponsive.

The final disadvantage to consider before purchasing a wireless tablet is that there are limited options on models.

Wireless tablets are still rather rare to the market so many of them are expensive and contain a lot of extra features that are not needed.

How to connect a bluetooth drawing tablet to a computer?

To connect your bluetooth tablet to a computer, first, ensure it has enough batteries.

Then, turn on the tablet and activate pairing mode, usually by pressing the "connect" or "pair" button.

Next, on your computer, go to the Bluetooth settings, search for available devices, and select your tablet from the list.

How to choose a wireless drawing tablet?

Apart from introducing a couple of new factors that you need to pay attention to (namely, connectivity and battery life), picking out the best wireless drawing tablet isn't all that different from choosing best pen tablet overall.

Wireless tablets that connect via a USB receiver or dongle can only connect to a computer or device if it has a USB-A port.

Bluetooth connectivity on the other hand does not require any dongle or extra receiver and can therefore easily connect to other Bluetooth-enabled devices without the need for any ports.

Likewise, battery life is another consideration. Be careful about what wireless tablet model you choose and how long their rechargeable lithium batteries last.

What are the 3 main types of graphic tablet? Does it support wireless connection?

In the world of graphic tablets you have three kinds: pen tablets without display, graphic tablets with display, and standalone drawing tablets.

1. graphic pen tablets

A non-screen graphic tablet consists of a pen and a plastic pad, with which you can perform various manipulations with information in various art programs.

Since your hand is on the tablet and your eyes are on a computer monitor, So screenless tablets are more difficult to use and take longer time to get used to.

They are a really good option for someone getting started in digital art. The main reasons for this is that they are much more affordable and quite durable.

This type of tablet has Wireless compatibility, You can often choose between a wireless or a wired only model.

Some of the most popular options include: Wacom Intuos, Huion Inspiroy, and XPPen Deco.

2. Pen tablets with screen

There are graphics tablets with screen available in the market. These devices are commonly referred to as "pen displays".

They combine the features of a traditional graphics tablet with the convenience of a built-in screen, allowing you to draw or design directly on the display.

There is a much smaller learning curve and it feels more natural from that perspective. However, Even if they have a display, you still need to hook them up to a computer, so not portable.

They are essentially secondary computer monitors you can draw on. These tablets doesn't have computing units like processor, RAM, storage, battery, and OS inside.

No such "wireless pen display" exists yet, as the amount of data that would need to be transferred wirelessly to get a FHD~4K display to operate unwired from an actual computer is too great.

At the top of this category are the Wacom Cintiq, Huion Kamvas and XPPen Artist. They come in all sorts of sizes with all sorts of options. Every extra, whether it be a bigger screen, or higher resolution functionality, will drive up the price point.

3. Standalone Drawing Tablets

They are powerful and costly machines that act as a full workstation all their own, allowing you to draw without the aid of any extra devices.

Brands like Wacom and Huion offer Dedicated all-in-one tablet workstations (Windows 11): Wacom MobileStudio Pro 13/16, and Huion Kamvas Studio 16 — essentially display tablets with built-in PCs.

Regular consumer tablets have come a long way, Apple's ipad Pros (iPad OS), Samsung's galaxy tabs (Android), and Microsoft's Surface Pros (Windows 11), with its special attention to artistic endeavors - support pen input, has garnered a passionate following.

All these independent drawing tablets can be used wireless, and portable, making them a convenient option for artists who want to create digital art while traveling or away from a computer.

The problem is the software available is limited - especially on android and ipad os, super expensive price, the pressure points on regular consumer tablet are not as good as professional ones.

10 Best Wireless drawing tablets

Here are our top 10 picks for the best wireless drawing tablets with or without a display built in:

1. Ugee S640W

2. XP-Pen Deco MW

3. XP-Pen Deco Pro MW

4. Huion Inspiroy Dial 2

5. Huion Inspiroy Q11K V2

6. Wacom Intuos

7. Wacom Intuos Pro

8. iPad Pro

9. Samsung Galaxy Tab S9

10. Surface Pro 9

Conclusion

Want to work or play without cables getting in the way? Wireless graphics tablets are becoming increasingly popular due to their mobility and flexibility.

These 10 best Wireless tablets are in different price brackets. Each has particular benefits and a lot will depend on your budget, preference, work type and skill level.

If you have the money for it, wireless standalone tablets with screen would be the best, most natural-feeling option for a mobile solution.

It doesn't matter if you pick the iPad Pro, Samsung galaxy tab or the Surface Pro 9, you will have a wonderful machine to work with.

In case you're a beginner or an intermediate-level artist, sticking to the budget wireless screenless pen tablets is probably a good idea.

They are unbelievably affordable and will still allow you to create artwork as good as anything created with a super expensive tablet.

It's up to you to decide which one best suit you.

Source: https://pctechtest.com/best-wireless-bluetooth-graphic-tablets


Tovább

Whats best drawing pad for Inkscape?

Inkscape is a free but powerful vector graphics editor, and for the best performance, you'll want a pen tablet that can handle its requirements smoothly.

It is very hard to create or design with a mouse and a keyboard. But drawing tablets allow you to create freehand digital art the same way you would with a pencil and paper.

If you are a designer or illustrator looking for the best drawing pen tablet for Inkscape, you may be confused as there are so many different brands, models, and types on the market.

Which one is the best suits your needs or budget? What do these drawing tablet features mean? That's why we've made this article, to ensure you get the best option for you.

In this post, we'll go into the realm of tablets and take into account a variety of variables, such as display vs non-screen, pressure sensitivity, performance, software compatibility, and brand, to assist you.

What is Inkscape?

Inkscape is a great free and open source program for creating vectors (scalable graphics that won't blur when you resize them).

It offers a stable, transparent, consistent and easy-to-customize user interface, along with a wide variety of vector editing and designing tools.

Your basic toolset includes creating straight lines, freehand lines, shapes, 3D boxes, Bezier curves, spirals, text editing, and so much more.

You can add layers, color fills, and even effects to your drawing such as blurs, bevels, shadows, textures, glows, and so on.

Additionally, it includes an extension-based approach that makes it simple to add new features, and there are several incredible ones available.

The many effects and advanced, industry-grade options available in Inkscape are numerous. such as alpha blending, cloned objects and markers. It comes with multiple gradients and helps you create complex combinations too.

The items you create in Inkscape are in the SVG file format, but you can also export in PNG, OpenDocument Drawing, DXF, sk1, PDF, EPS, and PostScript.

Because Inkscape is compatible with several formats, and you can transform your designs with 3D effects, filters, pixelation, blurring and more.

You can use it to create a business card, logos, online graphics, user interface, poster, paper scrapbooking, flyer, or just to practice your skills.

Is Inkscape as good as Adobe Illustrator?

Inkscape offers a completely free way to create vector images, while Adobe Illustrator is really expensive with Subscription model.

Although not quite as feature-rich as Illustrator cc, lacks polished look, Inkscape is still exceptionally full-featured and considered as a popular alternative application to Illustrator.

The main disadvantage of Inkscape is that it does not support CMYK colours for print, It's RGB only. However you can export a design as a PDF from Inkscape, and then manually change the colors to CMYK using other free programs like Scribus.

Plus, since the software is open-source, it has a thriving user community. Along with that large community, comes many helpful Inkscape tutorials.

The designers familiar with Adobe illustrator can efficiently operate this tool. Once you get past the steep learning curve and outdated interface, you'll master this excellent software to creat stunning artwork.

Why get a Drawing Tablet for Inkscape?

A drawing pad with pen is essentially replaces a mouse while you are working with graphic design application like Inkscape.

Mouse might be faster initially but the pen tablet has some innate advantages, which once mastered can speed up your workflow very much.

A digital stylus mimics the feel of a traditional pen or a brush. You have more control in moving vectors, nodes and vertices in graphics. The whole process feels faster, smoother, more accurate, natural and intuitive.

Digital pens support both pressure sensitivity and tilt recognition when drawing. This means the on-screen brush will respond to whether you press or tilt the pen and adjust the brush accordingly. This gives a natural and accurate feel when painting.

Certain tools like the Freehand Lines tool or the Calligraphic and Brush Strokes tool in Inksape become easier to use if you have a tablet. Also, the very common task of tracing a drawing to convert it into digital is easier.

A tablet can also save you time and effort, as you can switch between different tools or menus with the hotkeys, This seems like the better choice for efficiency.

Getting from one corner of the screen to the oposite one with precision is way faster than with a trackpad / mouse and it's always in one wrist move.

Not only will drawing with a mouse produce worse results, it is also very hard on your wrists. In contrast, a tablet can reduce the risk of strain or injury on your wrist, hand, and arm, as you can adopt a more ergonomic posture and movement.

How to choose the best drawing tablet for Inkscape?

While every tablet may have comparable benefits, not all tablets are created equal—so which tablet is best for drawing & designing in Inkscape?

You need to focus on several key features and functionalities before buying, such as tablet type, tablet size, pressure sensitivity, tilt sensitivity, stylus pen, brand, price and more.

1. Types of tablets

There are three different kinds of tablets suitable for creative work: pen tablets, pen displays, and standalone pen tablets.

You'll have the opportunity to choose between a wired and wireless tablet, a screen or non-screen, when you go to purchase one.

Pen Tablets without Screen

These are the most accessible and basic models, which don't include a screen, so an additional monitor would be a necessity.

The active area portion of the tablet corresponds with your screen, Drawing on the tablet with your pen registers on your computer screen.

It's a bit unnatural at first because of Hand-eye separation, but with time, patience and some practice, you will get used to it quickly.

Compared to tablets with screen, these screenless tablets are more affordable, portable, durable and have wireless compatibility.

If you want a screenless drawing pads for beginners, the Wacom Intuos, Huion Inspiroy and XPPen Deco are all good choices.

Pen Display Monitors

Working with the same technology as pen tablets but with the advantage of a built-in interactive display, pen displays are the favorite option of many professional artists and designers.

Pen display monitors usually come in sizes range from 10-inch to larger 32-inch. You can draw directly on the screen, exactly like draw on paper, or canvas, and it feels more natural and intuitive than non-screen type.

They do more expensive than non-screen tablets, still need a computer or a laptop to work and are not as portable as standalone tablets, however, they will considerably improve your working experience.

Buy a decent tablet with screen, the usual recommendation is the Wacom Cintiq, Huion Kamvas or XPPen Artist.

Standalone pen tablets

Not everyone wants a tablet as an accessory that connects to their computer.

Some prefer a standalone computer drawing pad, which has powerful internals, screen and os, a decent battery life, doesn't require a computer to operate, supports pen input.

If portability is your top concern, go for the standalone tablet. It's the best device to just pick up and draw anytime, anywhere.

Some popular options include the Apple iPad Pro (iPadOS), Samsung Galaxy tab (Android), Microsoft Surface Pro (windows), etc.

These are pretty expensive but a good option if you are earning money from your art.

2. Tablet Size

Graphic tablets come in many different sizes. The active area is the portion of the device that is sensitive to signal from a stylus. Usually, the larger sizes have a larger price tag.

Professionals prefer larger sizes while casual users find the smaller tablets sufficient for their needs.

The size of the tablet you use is largely influenced by your drawing style. People that draw with large gestural lines need a larger tablet and vice versa.

In addition, you also need to consider the size of your computer screen, working space and Portability. Larger tablets may tend to take more of your desk space and less portable.

3. Pressure Sensitivity

Pressure sensitivity means that the thickness of your brush stroke will differ depending on how hard or soft you push down the stylus on the tablet surface while drawing.

Generally, tablets have pressure levels starting from 4,096 all the way to 8,192. A higher level of pressure sensitivity allows for more precision and control when drawing.

Ideally, you'd want to find a tablet with a 8,192 pressure range if you're buying the tablet for illustration or design work.

4. Tilt Sensitivity

Tilt sensitivity on a drawing tablet refers to the ability of the tablet to detect and respond to the angle at which the stylus is held.

This allows for more natural and varied brush strokes, as the tilt of the stylus can affect the width, opacity, and other characteristics of the digital brush.

5. Express keys

More and more tablets are designed with Programmable buttons built into the tablet, usually on the side.

Instead of manually switching between tabs and apps, or simply selecting brushes in inkscape, these hotkeys will help you save time and streamline your work process.

6. Stylus

Stylus (pen) comes in two forms: battery-operated (AES) and electromagnetic resonance (EMR), but they're both designed to mimic the feel of pen on paper.

The Apple Pencil, Surface slim pen 2, along with a few third-party styluses, comes with built-in lithium battery, needs to be charged. Usually, the pen is sold separately from the already-expensive tablet.

Wacom, Huion, and XPPen and other professional drawing tablet brands, includes an EMR stylus with your purchase.These pens are battery-free, meaning it doesn't need to be charged.

7. Software Compatibility

Inkscape runs on all 3 main desktop operating system Linux, MacOS and Windows.

Thankfully, drawing tablet is designed to be used with a Windows or Mac computer, so it works seamless with Inkscape most of the time.

Note, since Inkscape isn't listed on the Google Play store and Apple app store, it won't work on any iPads and android based tablets.

So if you want a portable standalone drawing tablet for Inkscape, get a windows OS tablet, like microsft surface pro, Wacom MobileStudio Pro, and Huion Kamvas Studio 16.

8. Brand

Wacom, Huion, and XP-Pen are top 3 popular brands of graphic tablets that are used for drawing, sketching, and digital art.

Wacom is generally considered to be a high-end brand in the world of graphics tablets and they are known for their high-quality drawing experience and build quality, but they tend to be more expensive.

Huion and XP-Pen are considered as budget-friendly alternatives, they provide similar functionality and drawing experience as Wacom but at a lower cost. Many users find that they offer good value for the price.

Other less well-known brands include Ugee, GAOMON, Veikk, Xencelabs, Parblo, which also offer budget-friendly options for beginner artists and hobbyists.

If you want a more portable device for your artwork, then one of the best tablets from the likes of Apple, Microsoft and Samsung is likely to be a better option.

They offering fewer drawing-specific features but greater portability and everyday uses.

How to Use a drawing tablet with Inkscape ?

Here's a general process for using a graphics tablet in Inkscape:

Set up your graphics tablet: Connect the tablet to your computer using a cable or wirelessly, depending on the tablet model.

Install any necessary drivers or software provided by the tablet manufacturer. you can download from their official site.

Configure tablet settings: graphics tablets come with customization options, such as pressure sensitivity, buttons, or tablet mapping.

You can typically access these settings through the tablet's software. Configure the settings according to your preferences and the capabilities of your tablet.

Launch Inkscape: Launch Inkscape and create a new document, or open an existing one.

Select a drawing tool: Choose a drawing tool from the toolbar, such as the Pen tool or Pencil tool. You can also use the Brush tool or any other tool that allows you to draw or paint.

With the brush or pen tool selected, you can now start drawing on the canvas using your graphics tablet.

Customize brush settings: Inkscape provides various brush settings that you can customize to achieve different effects. You can adjust the brush size, shape, hardness, opacity, and other parameters using the brush options in the Control panel or the Brush panel.

Practice and explore: As you gain familiarity with your graphics tablet and Inkscape, continue to practice and explore different techniques to refine your digital drawing skills. Experiment with different brushes, textures, and effects to create unique artwork.

Pen Pressure not working in Inkscape ?

If you're on Windows OS and use a wacom tablet or alike, The troubleshooting solutions mentioned below should work.

Uninstall current wacom tablet driver and Install latest Wacom tablet driver.

Open Wacom settings. In the Mapping section:

Set Mode to "Pen". Then Select "Use Windows Ink".

In the Pen section:

Set Tip Feel somewhere medium-to-firm, to prevent maxing out pressure even with a light touch.

Set the function of the pen tip to "Click".

Open Inkscape, go to Edit > Input devices...

Make sure your Tablet is visible in the list of input devices.

If Tablet is not visible at all, close Inkscape, make sure the tablet is plugged in and functioning in other programs, then re-open Inkscape.

Select "Use pressure-sensitive tablet" and click Save, Restart Inkscape.

Select the Calligraphy tool (key C), From the top tool settings bar, click the icon of a down arrow pointing at a ramp. This enables pressure for this particular calligraphy preset.

Is pen tablet a must for graphic design and Inkscape?

Not every designer needs a graphics tablet, it's certainly an option, not a requirement. It depends on the type of work you will do in Inkscape and othe design programs.

If you're interested in learning graphic design and Inkscape, start with mouse and keyboard only. A majority of the functions in Inkscape is done with that only.

The tasks like web design, layout design or UI/UX design, you can do without a pen tablet. It will not make your work flow better/easier if you had one.

If you plan on making illustrations, do lineart/freehand drawing, it will be extremely time taking and difficult to do so without a graphics tablet.

Conclusion

Using a graphics tablet with Inkscape, Gimp and Krita allows you to draw, edit, sketch, and create digital artwork with more precision and control.

In fact, the suitability of drawing tablets depends on the requirements, comfort, and budget of a graphic designer.

If you're traveling a lot, working on trains, and doing a lot of sketching — a standalone tablet like microsoft surface pro might work great for you.

On the other hand, if you're primarily based at your desk, plus require pen tilt, and pressure — a tradition pen tablet and pen display might be a better choice.

Anyone who is new to graphic design, illustration, or on budget can make use of the pen tablet without screen.

If you want to step up your comfort level of drawing, a tablet with screen is the go-to choice for you.

Source: https://pctechtest.com/best-drawing-tablet-for-inkscape

Tovább

Huion Kamvas Pro 24 vs Wacom Cintiq Pro 24 Comparison

If you're a pro and do art on the computer, you need a drawing tablet with screen. But a small pen display feels cramped for drawing larger images, requiring a lot of zooming.

There is something really cool to having a giant display tablet to draw on, Which gives you a lot of drawing area to draw to your heart content.

If you have the budget, getting a 24-inch pen display would be terrific. Whether you draw with your wrist or with your arm, this drawing area is more than enough for you for the most part.

Far and away, the biggest name in the drawing tablet space is Wacom and the Cintiq Pro 24 is the Rolls-Royce of display drawing tablets.

Huion usually covers the budget-end of the graphics tablet market, and the Huion tablet that most closely competes with the Cintiq Pro 24 is the popular Kamvas Pro 24 which supports 4K.

Despite how the two device appears too similar, there are quite many differences between them.

One may be wondering whether getting the more affordable Kamvas Pro 24 is the best choice, or whether you will need or benefit from the more features Cintiq Pro 24 offers.

Wacom Cintiq Pro 24 vs Huion Kamvas Pro 24 Comparison: What are the main differences?

In this article, we did a detailed side by side analysis – comparing every single major and minor detail of the tablet. then you will know exactly which tablet is the best on your own.

We will look at the design, some of the specs & screen resolution, the pen, including pen pressure sensitivity, screen parallax, drivers, price and much more.

Design and Build Quality

When it comes to design both the tablet follows a minimalistic design, feels strong and sturdy. The tablet itself is all black quality plastic with a front glass screen.

The different thing is the overall size. The Wacom is bigger - it has a lot more bezel area around the screen. The one on the Huion is a lot smaller and looks more like a monitor.

After using both it is better to have that larger bezel area around the screen to rest your hand on when drawing near the edge.

On the tablet back you have two fold-out tablet legs, VESA mount as well as a number of ports for connectivity.

The main con of a Cintiq pro 24 or a Kamvas Pro 24 is its weight and bulk. Both devices are quite heavy and big —especially compared to smaller pen display, so less portable.

Screen Size and Resolution

With the Cintiq Pro 24 and Kamvas Pro 24 you're getting a 24 inch diagonal screen at full 4K UHD (3840x2160-pixel) resolution.

At a whopping 188 pixels per inch, the pixels is small and densely packed and you won't see individual pixels when you work (draw) up close to the screen.

If you're using a 24-inch screen with 1080p resolution for detailed drawing then you'll be distracted by how jaggedy your lines look.

In Comparison, having this 4K resolution does make a big difference, it's much crisper and feels great to see your artwork.

Plus, 2160P screen has significantly more canvas space compared to 1080P, This is great for productivity. You can place a reference photo by the side and still have enough canvas space to draw with.

Screen panel and Color Gamut

With IPS Panel, Cintiq pro 24 have excellent 99% Adobe RGB color gamut, 1000:1 contrast ratio, a billion colours, and the colors do look good right out of the box.

Kamvas Pro 24 uses the QLED technique to increase the color gamut to 102% Adobe RGB (140% sRGB), 1200:1 contrast ratio, 1.07 billion (10bit) colors for a more vibrant and saturated color on the display.

You may find that the colors on Kamvas Pro 24 are very oversaturated but not accurate, you should invest in a colorimeter to calibrate the screen. That said, the most accurate colors are not necessarily the most vivid.

Wacom Cintiq is designed to deliver the most accurate colors instead of over saturated vibrant ones so that when your work is viewed on other peoples' screens, it looks similar to what you, the artist, intended.

Screen Lamination

Both the tablets come with the exact same laminated screen, which means less parallax while drawing.

To give you an idea on what that is, Laminated screen is the screen that's made so that the top glass, digitizer, and the display are made of one flat piece.

This offers multiple advantages over non-laminated screens: preventing dust from getting under the screen glass, as well as having a thinner display. The most notable one is the reduced parallax.

Drawing Surface

Both Cintiq Pro 24 and Kamvas Pro 24 has an etched glass surface that gives the pen a slight tactility when drawing on it that would not be there if the screen were glossy.

You will also appreciated the glare reduction on the matte etched screen, which prevented the light from obstructing your vision.

In contrast, glossy screens reflect the world around them, which can be distracting and distort color accuracy unless you are working in a dark room.

Multi-Touch

The Cintiq Pro 24 comes in two variants – one with multitouch and one without it. You will have to pay extra for this feature.

The Huion Kamvas Pro 24, on the other hand, does not come with any touch support – whatsoever.

Being able to perform shortcuts such as zoom, pan, scroll and rotate using touch-based gestures can be very convenient.

But Multitouch support on the Cintiq Pro 24 is pretty terrible. Its palm rejection is bad and the overall touch experience feels laggy and unreliable.

Most artists simple choose the tablet without the multitouch or just stop using it after a while.

Wacom Pro Pen 2 vs Huion PW517 Stylus

Both the Cintiq Pro 24 and Kamvas Pro 24 comes with a very comparable stylus. They have two buttons on the side and a soft rubber grip at the front half.

But Wacom Pro pen 2 has an eraser at the back whereas Huion PW517 stylus doesn't have an eraser at the back.

They are battery-free, comes with 8192 levels of pressure sensitivity, 60 degrees of tilt recognition, fast response time and accurate tracking that provide an equally good drawing experience.

However, The Huion PW517 pen has a higher Initial Activation Force than Wacom pro pen 2. It require you to press down ever so slightly more to get it to register.

In addition, The tilt of Huion stylus can cause the cursor to move a little when you don't want it to and it can be really annoying.

Overall Huion stylus is good, but the Wacom Pen is the best.

Tablet Stand & VESA Mount

The fold-out feet of both tablets can only prop up the pen display at a fixed angle of 20°, If you want a comfortable angle to work with for drawing, then you will need a proper stand.

The back of the Kamvas Pro 24 comes with a 100 x 100mm standard VESA mounting holes, it's compatible with a wide variety of arms, stands, and brackets.

Unfortunately, Cintiq Pro 24 can't be mounted with VESA mount, as it has a weird 80x495mm hole pattern, which only supports Wacom's own stand.

The Huion ST100A multi-adjustable stand is an extra-cost option ($49.99)—highly recommended.

Wacom has two options with the Ergo Stand and the Wacom Flex Arm, with both compatible with the Cintiq Pro 24.

Wacom's stands are a bit expensive for some artist, the Ergo stand retails for $500 alone, and the Wacom Flex Arm retails for $379.

Wacom Expresskey Remote vs Huion Keydial Mini K20

Neither display comes with built-in express keys, and instead including their handy express key remote.

Both will magnetically stick to either side of the display keeping it handy at all times. This is more flexible, allowing you to freely place it on the screen or the desktop.

Wacom's Expresskey remote has a total of 17 buttons and a touch ring. It connects wirelessly via 2.4GHz Wifi to the computer.

The Huion's mini keydial K20 remote has a similar design to the Wacom with 18 buttons on the bottom, and a circular button on the top. But It connects wirelessly via bluetooth to the computer.

All the buttons on both Expresskey remotes can be assigned to any shortcut of your choice, making the workflow more fluid. It works across all the drawing, editing and modeling programs.

Pen Holder

The Wacom Cintiq Pro 24 has a pen stand that holds 10 extra pen nibs (they do wear down with use, 6 standard, 4 felt). There's also an extra pen holder that snaps to the top of the display.

As for Huion, The doughnut-shaped pen holder is a secure place to keep the pencil when not in use, and it contains ten extra pen nibs, of which five are felt nibs intended to simulate drawing on paper.

Compatibility and Connectivity

Both Cintiq pro 24 and Kamvas pro 24 are compatible with various operating systems, including MacOS, Windows and Linux. They also works with a range of software including programs from Adobe, Autodesk, Affinity, Corel and more.

Cintiq Pro 24's Connectivity is excellent. You'll find twin USB-A ports on its right and left sides, plus a standard 3.5mm audio jack and full-sized SD card slot. Round the back is USB-C port plus HDMI, and DisplayPort connectors.

Several connectivity options are lined up on the back of the Kamvas Pro 24, such as USB-C, Display Port, and HDMI. It also equipped with two USB-A ports and a 3.5mm headphone jack.

You can connect both devices to a PC/Mac using the DisplayPort, USB Type-C sockets, or HDMI. There are two cables: one for power, and one USB-C/HDMI cable for video data.

Driver Software

Once you've got everything plugged in you'll need to download the latest drivers from the Wacom or Huion official website.

Whilst you're in the settings menus of wacom driver software you'll notice there's an enormous amount of customisation available to you.

As well as setting shortcut keys on the Remote, you can even set your own pressure sensitivity curves and click thresholds.

Each application can have its own settings, and you can save your custom settings as different profiles, for almost limitless flexibility.

Huion has less fully featured driver software as Wacom's, for example, You can't set application-specific settings.

Huion's driver work fine, reliability has improved quite a bit, except for some crashing and minor issues.

Cooling

There is a fan on Cintiq Pro 24, which keeps the display from ever getting really hot. But many users were not fond of the level of noise that the Cintiq Pro fans make when running.

There are no fans with Huion kamvas Pro 24 so no fan noise. And the unit doesn't get hot at all, the thermals are pretty decent.

Price

Huion kamvas Pro 24 is the clear winner if we take the price into account-1,299.00. Wacom Cintiq Pro 24 cost more at $1,949.95, leaving many artists out of the market.

There are a number of other 24-inch tablets that you can look into such as the – Huion Kamvas Pro 24 (2.5k) and XP-Pen Artist 24 Pro, which is cheaper but has a slightly lower resolution of 2.5K.

Related Posts: Huion Kamvas 13 vs Wacom One 13 ComparisonHuion Kamvas Pro 16 vs Wacom Cintiq 16 ComparisonXPPen Artist 22R Pro vs Wacom Cintiq 22 Comparison .

Conclusion

Both are top-quality display tablets, the screen is extremely clear and the colors are vivacious, probably the best that money can buy.

The 24 inches of diagonals really allow you to go into details very easily, and especially without straining the eyes.

If you're the one that paints and draws from the shoulder with big arm movements and if you can afford it, this is your tablet.

Despite some flaws, Huion Kamvas Pro 24 is a better option, it manages to finely balance having a good selection of features at a reasonable price.

But We also recommend saving up more for Cintiq Pro 24 if line quality, durability and longevity is concern.

For something that is used in a professional setting or even an advanced hobbyist the Wacom is a must.

Source: https://pctechtest.com/wacom-cintiq-pro-24-vs-huion-kamvas-pro-24

Tovább

Beginner guide to become a digital artist

Nowadays, it seems that digital art is everywhere on the internet. There are dozens of types of digital art, ranging from digital painting to 3D animation.

Have you ever wondered how you can turn your creative ideas into stunning digital art? Anyone can be an artist in this digital age.

But getting started can be overwhelming. How do you begin? Fear not— it's easier than you think!

By providing an easy-to-follow beginner guide to start digital art, this article empowers newcomers to understand the types of digital art, choose the right tools and software, and where you can proudly display your masterpieces.

What is digital art?

Digital art is a contemporary artistic medium that encompasses a wide range of creative works produced using digital technology.

It is the fusion of traditional art techniques with the digital tools and techniques made available by computers, graphic tablets, and software applications.

Digital artists use these tools to create, manipulate, and enhance their artwork, resulting in a diverse spectrum of visual expressions.

The fundamental characteristic of digital art is the use of a digital canvas, such as a computer screen or graphic tablet, combined with digital drawing tools like styluses and pens.

This allows artists to paint, draw, sculpt, and design with remarkable precision, flexibility, and efficiency.

The artistry in the digital realm comes to life through the manipulation of pixels, vectors, and layers, making it a versatile and dynamic medium.

Different types of Digital Art

There are many different types of digital art, including animation, drawing, photo manipulation, 3d modeling, and more.

1. Photo Manipulation

Photo Manipulation is pretty simple — editing an image to whatever you want it to look like. Since you're using photos, this is a pixel-based, or raster, type of digital art.

There are subtler versions of it, like touching up a family portrait and fixing lighting and a few facial blemishes, and more prominent versions of photo manipulation, like combining a picture of a pirate ship and some planet images into a space pirate sci-fi scene.

2. Digital Illustration

Digital illustration, graphic design, and vector art is all around you, even if you don't notice it. It's in apps and app icons, websites, manuals and brochures, and even books.

This type of digital art is made of shapes all layered together to create an image like a flat illustration — shape/vector based, not pixel based. It's often used for branding and logos, and creates clean and crisp art.

3. Digital Painting

Digital painting is probably what pops into your mind when someone says ‘digital art'. It's raster/pixel-based, like photo manipulation, but unlike photo manipulation, which combines and edits images to bring them together.

with digital painting, you're creating something from a blank canvas. It's basically just drawing/sketching/painting digitally, and usually depicts characters, landscapes, and scenes.

4. Animations

Moving images or a series of drawings that come together to create motion. This includes everything from animated movies to GIFs you see online.

5. 3D Art

3D art is becoming more and more popular — it's graphics are being used in websites, apps, and interfaces in every category and subcategory.

3D modeling also has a huge role to play in the video game industry, as well as animated shows and movies. 3D models are digital objects that can be rotated and viewed from all angles. They're often used in games, movies, or product designs.

Choosing the hardware to get started with digital art

First thing you'll need when you want to get started making digital art, is hardware. There are two main options: computer + drawing tablet, standalone pen tablet.

1. Computer

If the art program is heavy, your computer may use too many resources and you may end up getting lags while drawing.

This depends on the specifications of your computer; if it is a high-end one with the best in class CPU, GPU and copious amounts of RAM, then no need to worry!

Depending on your software, you would generally want a computer with:

-At least 16GB of RAM

-A discrete GPU separate from your CPU

-At, least an Intel Core i5 or Ryzen 5, or something equivalent

-You can also ignore all of these if you have a apple Mac with the M1 or M2 Processor.

2. Drawing Tablet

You can make digital art with a mouse, But a pen tablet with pressure sensitivity will give a much more natural feel when drawing.

Some things you want to focus on are: Drawing surface size, Pen, Pressure sensitivity, Express Keys, and Price.

There are two main categories of graphics pads for beginners: tablet without screen, tablet with display.

A non-screen graphic tablet have two components: a touch-pad, and a stylus. It works a bit like a mouse and needs to be attached to your PC or laptop.

In order to use the tablet, one needs a good sense of hand-eye coordination. These types of tablets are usually cheaper, but offer everything you would need to draw digital art.

Display tablets function like graphic tablets, but with a built-in monitor. You can draw directly onto a screen, which feels more intuitive, accurate and nature.

They are usually $200+ more expensive than graphics tablets, size range from 10-inch to 32-inch. But they still need an extra laptop or computer to plug your tablet into – these are essentially a screen monitor.

There are a number of brands for Drawing tablets, but the good 3 name brands you need to know are: Huion, XP-Pen or Wacom. Most tablets that these have to offer are really good, some being more expensive than others.

Wacom was meant for professionals, hence it has an expensive price. Huion and XP-Pen are brands generally bought by beginners and enthusiasts, because they have really good value for money. Other Best Wacom Alternatives include Veikk, Gaomon, and Ugee.

3. Standalone Pen Tablet

You can always use other standalone tablets, like the famous Apple iPad Pro (iPad OS), Microsoft Surface Pro (Windows) or Samsung Galaxy Tab lineup (Android).

All these tablets have pen input support, in-built computer and screen, This makes them very portable – you can take them anywhere, such as sketching on the couch or out in a cafe.

The downside is that they are more expensive, and you have a very limited selection of software available to you.

Choose a digital art software that suits you

This can be drawing software, or it can be 3D modeling software, or even animation software. Whatever works for you.

Each program has its unique strengths and features that can enhance your ability to create your own digital art.

Also, the choice of digital art software depends on your hardware and operating system, because not all software is compatible with all devices.

1. Photo Editing Software

To get started with photo manipulation, you need a photo editing program. While the industry standard is Adobe Photoshop, it's monthly recurring fee can be a bit steep for those just starting out.

Affinity Photo is a powerful and affordable image editor that is directly competing with Photoshop for enthusiasts and professional users.

A great free alternative that still has great function and a good amount of online tutorials is the desktop software GIMP.

Photopea, Canva or Pixlr Editor is perfect if you want to have a browser-based, online way to edit your photos.

2. Digital Illustration Software

As for Digital Illustration software, the most popular digital illustration app is Adobe Illustrator, but as with Photoshop, it's monthly cost isn't all that appealing to beginners.

Coreldraw is another popular Illustration software for print ready graphics and illustrations, the UI is very user friendly and easy for graphics designers.

In terms of function and style, Affinity Designer is an impressive, low-budget alternative to Adobe Illustrator.

Good free alternatives to Illustrator is Inkscape, great to draw beautiful drawings, very fast and light weight.

3. Digital Painting Software

Many artists use Photoshop for digital painting because of Photoshop's wide range of brushes and tools, but there are also some other great alternatives with a cheaper price tag.

If you want to get into digital painting without spending a few hundred dollars every year. This includes Clip Studio Paint, Procreate, Corel Painter, Paint tool SAI, Sketchbook, and free drawing apps like Krita, Medibang Paint, Firealpaca, Mypaint, Artweaver, etc.

4. Animation Software

2D Animation Apps: For those who like drawing and creating 2D animation, Toon Boom Harmony, Adobe Animate, Moho Pro, Synfig Studio, Opentoonz, Pencil2D and TVPaint are all well-known and high-quality animations tools.

3D Animation Programs: For 3D animation, Start with any of the software - Blender , 3ds Max, Autodesk Maya, Cinema 4D, Houdini, Modo, Daz Studio, Cascadeur any one of them .

5. 3D Modeling Software

Maxon Cinema 4D, Autodesk Maya and 3DS MAX are three of the most famous 3D modeling software which artists and studios often use in many fields.

Pixologic ZBrush is a digital sculpting tool that combines 3D/2.5D modeling, texturing and painting.

Blender is the most popular 3D creation platform which is free, open-source and powerful. It supports the entirety of the 3D pipeline—modeling, rigging, animation, simulation, rendering, compositing and motion tracking, even video editing and game creation.

How to start Digital Art?

If you guys are a complete beginner with no art experience you should start with drawing by traditional methods first(pen and paper method).

We know that this is not the thing you were expecting but at least do some basic exercises which will give you the flow to draw in the drawing tablet or a iPad or any other gadgets you name it and it requires the skills.

Practice the Art

After getting comfortable with the basics, hardware and software, start your art journey by practicing art.

First choose your Niche or art of your interest and start working towards it. because in the field of art you will improve only when you practice daily or at least practice two to three days a week.

Once you started practicing you will see the results as time goes by and trust us guys it will give you a satisfaction which makes you happy and gives you motivation to draw more and practice more.

Best Digital Art Sites to Share Your Artwork

In the digital world, authenticity and connection are key.

Are you ready to show the world your artwork? These well-known online art sites are the right places to share and explore new digital art Ideas:

DeviantArt: The place to discover millions of works of art in every shape, size, and style. You can also join art tribes and make your voice heard.

Behance: Here you can exchange ideas with other digital artists, show off your portfolio, and let the community boost your creative ego.

ArtStation: For professionals and aspiring artists alike, especially those in gaming, film, and entertainment. Show them what you've got!

Dribbble: If you are interested in digital design, illustration, or animation, this is your stage to shine. It's also a place where you might land a gig.

Pinterest: Here you'll find an endless treasure trove of ideas and inspiration for all your digital art projects. Create boards, save pins, and unleash your creativity.

Medium: Not just for reading, but also your platform for sharing your stories, especially those related to digital art. Immerse yourself in the world of Blogging Guide, Digital Art, and Pixel Vision.

In addition, Utilize social media to your advantage. Share your art on platforms like Instagram, Facebook, and Twitter. Engage with your audience, and post behind-the-scenes glimpses into your creative process.

Conclusion

We hope our post gave you a better guide on digital art. Enjoy the process and not the destination so that you will feel the satisfaction guys.

Getting started with digital art can feel like an overwhelming task, but don't let the stress get to you.

Adjust your expectations, and watch some tutorials. Your goals won't seem so formidable once you get the hang of things.

If you can do that, you'll be well on your way to mastering a new skill set.

Source: https://pctechtest.com/beginner-guide-to-start-digital-art

Tovább

pctechtest

blogavatar

The best laptops, tablets, smartphones review by dig deep into what's new from the world's biggest manufacturers to help you find it.